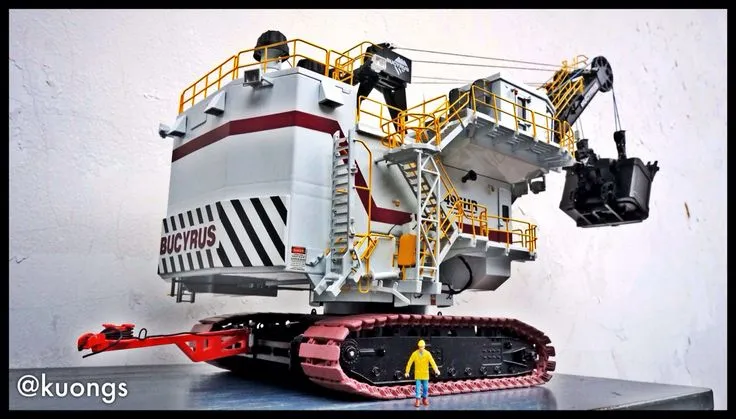
What is Diecast Heavy Equipment
Diecast heavy equipment models are meticulously crafted miniature replicas of real-world construction machinery, mining vehicles, and other industrial equipment. These models are typically made using a die-casting process, where molten metal (usually zinc alloy) is injected into molds to create highly detailed and durable pieces. The level of detail can vary, but many models accurately replicate the features, colors, and markings of their full-size counterparts. Collecting diecast models is a popular hobby, and these models serve as both display pieces and educational tools, providing enthusiasts with a tangible connection to the world of heavy machinery.
The Appeal of Diecast Models
The appeal of diecast heavy equipment models is multifaceted. For collectors, these models offer a way to appreciate the engineering and design of heavy machinery without the space or expense of owning the real thing. The realism of the models, with their intricate details and accurate paint schemes, is a major draw. They can be used for education. For some, it’s the joy of the hunt, seeking out rare or limited-edition models to complete their collections. Furthermore, they represent a tangible connection to industries like construction and mining, sparking curiosity and a sense of wonder in both young and old alike.
Why Choose Diecast Over Other Materials

Compared to plastic or resin models, diecast models offer several advantages. The metal construction provides a superior level of durability and heft, giving the models a more realistic feel. Diecast allows for finer details and more complex designs than other materials, resulting in a more accurate representation of the original equipment. The weight and feel of a diecast model are more satisfying for many collectors. While plastic models can be less expensive, diecast models generally offer a higher level of quality and collectibility, making them a worthwhile investment for serious enthusiasts.
Essential Tools and Materials
Embarking on a diecast model project requires a selection of essential tools and materials to ensure a successful and enjoyable experience. Gathering these items before you start will streamline your work and improve the final result. From basic hand tools to specialized supplies, having the right equipment is crucial for tasks such as disassembly, cleaning, painting, and detailing. Careful preparation and the proper use of these tools will enable you to achieve the best possible outcome when working on your diecast models.
Tools You’ll Need
The tools needed for diecast model projects range from basic items to more specialized equipment. You will need a set of small screwdrivers (Phillips head and flathead) for disassembling the model. Hobby knives or X-Acto knives are useful for trimming parts and removing flash. Pliers, especially needle-nose pliers, are invaluable for manipulating small parts. A cutting mat protects your work surface. Tweezers will help you hold and position the tiny parts during assembly. Magnifying glasses or a magnifying lamp can provide better vision for detailed work. Finally, consider investing in a small hobby vise to hold parts securely.
Recommended Adhesives and Paints

Choosing the right adhesives and paints is essential for creating a high-quality diecast model. For assembling plastic parts, plastic cement or model glue is typically used. For metal-to-metal bonds or repairing diecast parts, consider using a strong epoxy or super glue. When choosing paints, acrylic paints are generally recommended for their ease of use, quick drying time, and minimal odor. Enamel paints offer a more durable finish. For detailing, fine-tipped paintbrushes are a must. You may also need primers, thinners, and clear coats for added durability and aesthetics. Make sure you use paints and primers specifically designed for models.
Preparing Your Diecast Model
Proper preparation is key to achieving a professional-looking finish on your diecast model. Taking the time to clean, disassemble, and prepare the model’s surfaces will significantly improve the adhesion of paints and decals and ensure a more realistic appearance. This stage is essential for removing imperfections, smoothing surfaces, and creating a solid foundation for your artistic work. Thorough preparation transforms an ordinary model into a standout collectible.
Cleaning and Disassembly
Before starting any painting or detailing work, it’s essential to clean your diecast model thoroughly. Begin by gently washing the model with warm, soapy water to remove any dirt, dust, or grease. Use a soft brush to clean hard-to-reach areas. After washing, rinse the model thoroughly and allow it to dry completely. Next, disassemble the model as much as possible, using the appropriate screwdrivers and pliers to remove parts. Carefully place all the parts to prevent them from getting lost. Disassembly will allow you to paint individual parts easily and achieve a more realistic finish.
Surface Preparation Techniques

Once the model is disassembled and clean, the next step is surface preparation. This involves removing any imperfections, such as mold lines or flashing, using a hobby knife or fine sandpaper. Lightly sand any areas that will be painted to improve paint adhesion. Consider using a primer coat designed for metal surfaces. Primers will smooth the surface, cover minor imperfections, and provide an ideal base for the subsequent paint coats. Ensure that the primer is completely dry before moving to the next step.
Painting and Detailing
Painting and detailing are the core of the diecast model customization process. This stage allows you to transform a plain model into a highly detailed replica. Choosing the correct colors, mastering the painting techniques, and applying weathering effects can create a stunningly realistic result. Whether you want to replicate the original paint scheme or create your custom design, patience, and precision are key to achieve a professional-looking finish.
Choosing the Right Paint
The type of paint you choose will significantly impact the final appearance of your model. Acrylic paints are an excellent choice for beginners. They are easy to use, dry quickly, and offer minimal odor. Enamel paints are more durable and provide a glossy finish, but they take longer to dry and require more ventilation. When selecting colors, match the original equipment as accurately as possible, and refer to online resources. Consider using a combination of different paint types and techniques to create a realistic and multi-dimensional finish. Using high-quality paint will help the model last.
Painting Techniques for a Realistic Finish

Achieving a realistic finish involves mastering various painting techniques. Thin, even coats of paint are key to avoid drips and runs. Use multiple thin coats instead of one thick coat. Airbrushing is an excellent method for applying smooth, even coats of paint. If you are using brushes, use fine-tipped brushes for small details and a larger brush for the main surfaces. Masking tape is useful for creating clean lines and separating colors. Be patient and allow each coat to dry completely before applying the next. Practice your painting techniques on scrap pieces before applying them to the model.
Weathering and Aging Effects
Adding weathering and aging effects gives your diecast model a more realistic appearance. Weathering techniques replicate the wear and tear that real-world equipment experiences. Dry brushing is a useful technique for adding highlights and shadows, making the model look more three-dimensional. Washes can be applied to panel lines and recessed areas to add depth and detail. Pigments can be used to simulate dirt, rust, and dust. Remember that less is more; gradually apply weathering effects until you achieve the desired look. The goal is to replicate the appearance of equipment that has been used on a job site.
Assembly and Finishing Touches
Once you have completed painting, detailing, and weathering, it’s time to reassemble your diecast model and add the finishing touches. This step requires careful attention to detail, ensuring that all the components are correctly assembled and that any final adjustments are made. This stage brings together all the parts of your project and completes the transformation from a model to an incredibly detailed replica. Correct assembly is essential for a polished look.
Putting It All Together

Reassembling your diecast model is the last step of the process. Carefully reattach all of the parts you disassembled. Use the appropriate adhesive or glue to secure any loose pieces. Ensure that all the moving parts function correctly. Make sure that decals and markings are applied properly. Use a clear coat to protect the paint and decals, and to give your model a smooth, consistent finish. Carefully inspect your model to ensure all parts are correctly placed and secure before declaring it complete.
Displaying Your Diecast Heavy Equipment
Displaying your diecast heavy equipment models allows you to showcase your work and protect your collection. Consider using display cases to protect your models from dust and damage. Arrange your models in an appealing way. Group them by type, brand, or scale. Lighting can significantly enhance your display. Use spotlights or LED strips to illuminate your models and highlight their details. Think about creating a diorama base to add context and realism to your display. Regular maintenance, such as dusting, will help preserve your models. With careful display and care, your diecast model collection can be enjoyed for years to come.